Inspiring Creativity and Digital Collaboration in Online Design Workshops
- For this past year’s virtual Mozilla Festival, we designed and ran “Explain Decentralization To Me” — a zine-making workshop structured to meet the needs of a global audience while still preserving the in-person experience.
- Our work in selecting an infinity whiteboard platform and designing the event focused on maximizing user accessibility and maintaining the zine community’s creative, do-it-yourself spirit in an online workshop environment.
- When designing your own digital workshop, always anticipate and center the needs of your audience, account for various skill levels, prepare test runs, incorporate feedback in advance, and be flexible during the event itself.
With design workshops moving increasingly online, it’s important for designers to familiarize themselves with new tools, approaches, and ways of thinking. When doing so, a common concern tends to arise: How can an online workshop be designed for a global audience while still preserving the value of an in-person experience? In preparing for this past year’s virtual edition of Mozilla Festival, our team met this challenge head on in designing a zine-making workshop for the festival called “Explain Decentralization To Me” (a zine is a format of self-publication that affords creators the utmost freedom of self-expression). The zine community often embraces a spirit of DIY (do-it-yourself) in ways that differ from traditional techniques throughout the production process. So as we planned the workshop, we asked ourselves: How might we foster this creative, DIY spirit in an online workshop?
Selecting a platform
A unique and exciting production element of zine-making is the ability to experiment with a wide range of materials, visual styles, and formats. From paper type and texture, to page layout and binding technique, there is virtually no limitation on how one can choose to tell their story. Yet the beauty in the diversity of zine aesthetics is difficult for a single digital tool to achieve. In choosing a platform for the workshop, we sketched out a list of criteria in hopes of maintaining and facilitating these diverse aesthetics. The platform needed to:
- Be easy to use and fast to learn.
- Allow for effortless digital collaboration.
- Replicate the zine-making process to a certain degree, including working with papers, designing a page layout, and adding photos, texts, folding, and binding.
- Allow for markdown / printable format.
Given these requirements, we selected Miro from the sea of emerging online tools and platforms designed to accommodate the new norm of remote working and digital collaboration. Miro stood out for two reasons: Accessibility and Usability.
To choose the right tool, we need to know the audience of our workshop. The first thing to consider is accessibility. Our audience was joining from around the world, so we knew that they would have different levels of internet connectivity. Ideally, the platform we chose would either require a minimal bandwidth to join or allow people to access via different devices. Not only did Miro meet these requirements, but it also had the option of granting participants full access to the workshop materials without signing in or signing up.
The next thing to consider is usability. In comparison, Miro is easier to onboard than other options like Figma because it is generally beginner-friendly and requires less technical expertise. Nonetheless, we knew many participants would likely be inexperienced with Miro, so we prepared a Miro walkthrough as part of the workshop agenda and included a clear indication of what technical knowledge was required in the workshop introduction to reduce technical barriers and confusion.
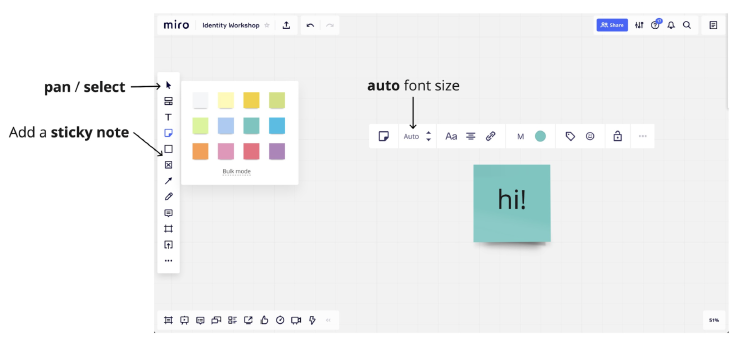
A screenshot of our Miro walkthrough
Designing the workshop
Board organization plays an important part in the design of any successful workshop. Not only does it present the workshop’s visual aesthetic, it also dictates the flow of activities and how participants should navigate the workshop space when they first arrive. A typical workshop will likely have the following boards:
- Welcome & Introduction
- Workshop Goal & Agenda
- Community Guidelines / Rules of Engagement
- Tool Walkthrough
- Main Activities
- Closing & Feedback
In a time-limited workshop, especially those that are under 90 minutes, advance preparation is key. We made sure to eliminate all time-consuming tasks or tasks that add cognitive load, such as external browsing for materials or long lectures. Our goal was to make the workshop as thorough and smooth as possible. To do so, we planned ahead by walking through scenarios where each participant had different needs and designed the board to address them. In advance of the actual workshop, we also performed test runs with our colleagues, whose feedback was then incorporated into the final design of the workshop.
To help participants more fully immerse themselves in the creative process, we configured the infinite whiteboard as if it was a physical space. We created a “craft station” that featured two sample zine templates, a blank zine template, and a visual library. Each participant had their own work station with the basic materials, instead of having to create their own empty board or copy and paste the template from one place to another. This maximized the use of time and enabled experienced zine-makers and beginners alike to enter the making process with ease.
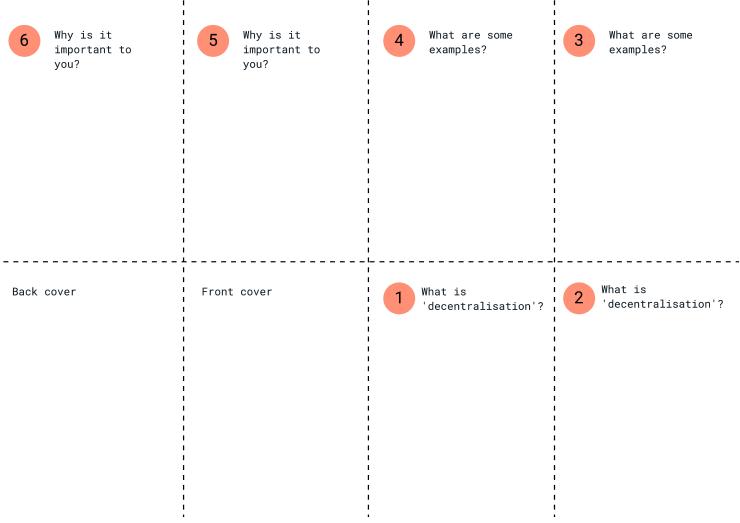
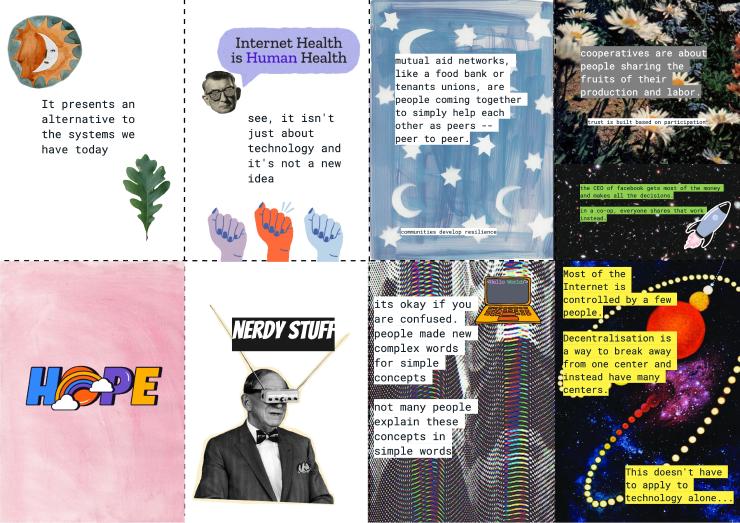
Zine template 1: Explanatory

Zine template 2: Storytelling

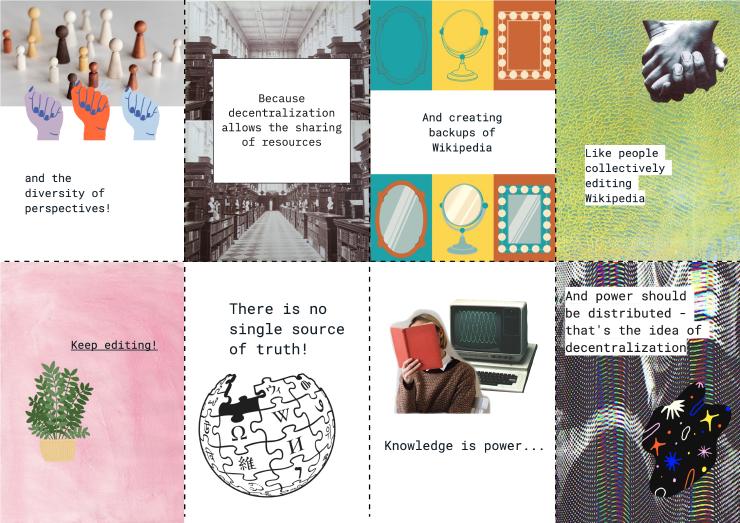
Library of stickers provided in the workshop. These stickers can be easily copied and pasted or dragged and dropped from one board to another. All images are CC licensed.
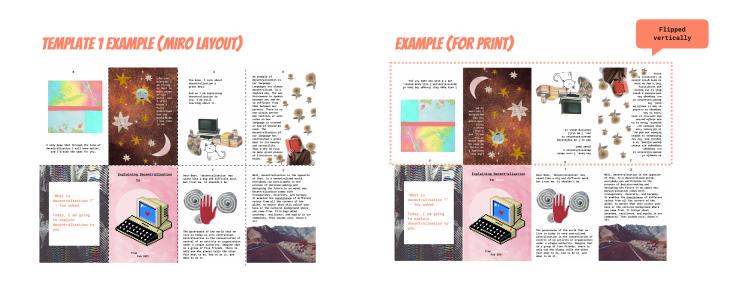
Example of a digitally finished zine before printing and folding.
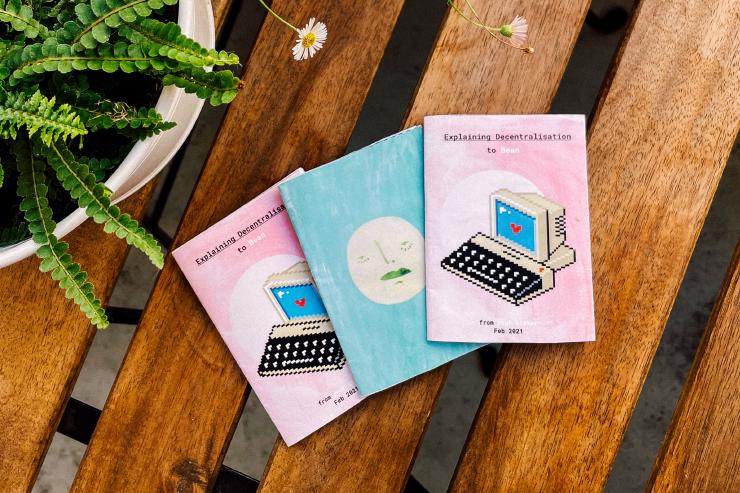
Printed outcomes
Key takeaways & tips
There are many different ways to measure the success of a workshop, but for us, success reveals itself in the small little things. It is seeing the busy boards with items being added and sticky notes being dragged and moved around. It is feeling the creative energy and the atmosphere of collaboration that everyone exerted despite the barrier of screens between us. It is seeing participants return to the boards and keep working on their zines after the wrap-up.
Looking to the future, the next time we facilitate a digital-making workshop, we might do a few things differently. While Miro is among one of the most powerful infinity boards available, we would like to test an open-source alternative. In addition, it would be helpful to get more involved with the community of zine-makers, designers, and other interested creatives by establishing a common platform for exchanging ideas and publishing decentralization on-boarding materials. Having a process for sharing, reposting, licensing, and open-sourcing the outcomes of the workshop in place beforehand would be a great way to maximize the workshop’s impact and share knowledge.
Below, we summarized our top tips for designing a virtual workshop. After you review them, have fun creating your own decentralization zine with our open-sourced template here!
General virtual workshop design tips:
- Always keep your audience in mind. You’re creating the workshop for them. To help best meet their needs, ask yourself:
-
- What is their level of technical knowledge?
- What is their tool proficiency?
- What is their internet connection?
- Which browsers do they use?
- What is their language?
- If you can, hold a test run with colleagues, friends, or family to receive crucial feedback on your design (this is especially helpful at an early stage). Try to incorporate at least two rounds of feedback for your design.
- Time each session in a test run and adjust accordingly.
- Make sure to account for extra time for people to join at the beginning of the workshop (not everyone is going to show up to the call on time!).
- Introduction activities should be inclusive and make people feel welcome.
- Remember, when it comes to the digital world, everything is possible. So keep an open mind and maintain a flexible attitude to help create the best overall experience for everyone!
Tips for infinity whiteboard workshop design:
- If your participant is new to infinity whiteboards, try to stick with the main feature (sticky notes). Instead of naming each frame (‘rename frame’), use a seperate big text box on top of each frame – this helps participants navigate much quicker.
- Use a big black rectangle to hide boards that you will address later in the workshop to avoid distraction.
- Remember to lock your board to avoid people moving everything around.
- Use arrows to help people navigate the boards.
- Provide written direction for each activity.
- Make use of the timer feature. Miro has some great countdown tunes!
- If you need to take a break to re-set/set-up the board, just let your participants know (but don’t take more than a minute or two!).
Selected zines from our MozFest workshop:
Credit: Anuradha + Karissa

Credit: Ingrid + Manish
Credit: Nancy + Eileen
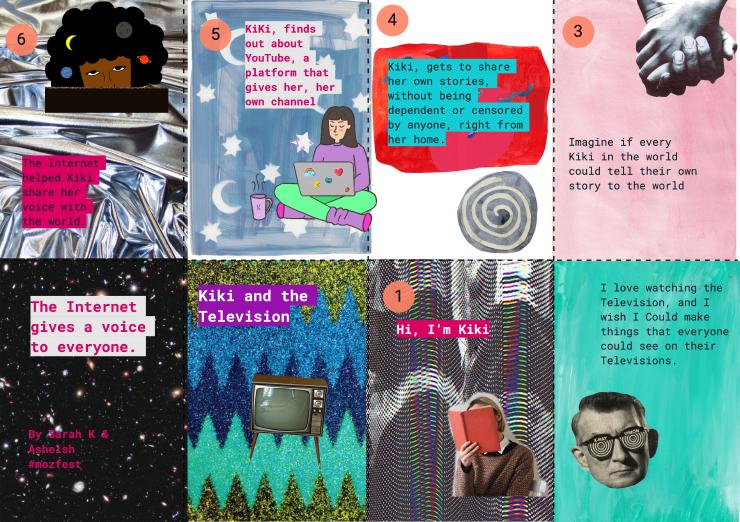
Credit: Sarah K + Ashelsh

Credit: Shu + Ngọc
-–